 Inspiration:
In honor of our favorite reality TV show, The Amazing Race, I am going to attempt a new recipe inspired by the country/countries visited each week. This week, the race begins in California, and they head to Brazil.
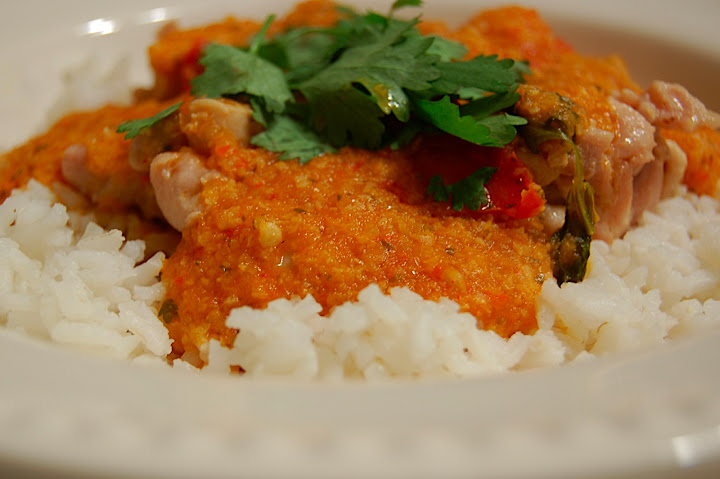
I found this recipe for Brazilian Chicken Stew from Food & Wine, which incorporated tomatoes, onions, garlic, and cilantro from our CSA.
Ingredients:
- 1/3 cup peeled and thinly sliced ginger (3 ounces)
- 4 garlic cloves, chopped
- 2 jalapeños, seeded and chopped
- 2 tablespoons fresh lemon juice
- 1 tablespoon sweet paprika
- 2 tablespoons water
- 1/4 cup vegetable oil
- 3 medium onions, coarsely chopped
- 2 cups drained canned plum tomatoes, coarsely chopped, juices reserved
- 1/2 cup unsweetened coconut milk
- 1/2 cup dry-roasted peanuts, finely chopped
- 1/4 cup shredded unsweetened coconut, plus more for garnish
- 1/4 cup chopped cilantro, plus more for garnish
- 3 cups chicken stock or canned low-sodium broth
- Salt and freshly ground pepper
- 2 pounds skinless, boneless chicken thighs, cut into 1 1/2-inch pieces
- Steamed rice and lemon wedges, for serving
Instructions:
- In a food processor, pulse the ginger with the garlic, jalapeños, lemon juice and paprika until finely chopped. Add the water and process to a paste.
- In a large saucepan, heat 2 tablespoons of the oil until shimmering. Add the onions and cook over moderate heat until softened, about 8 minutes. Add the ginger paste and cook until it begins to brown, about 3 minutes. Add half of the tomatoes along with the coconut milk, peanuts, 1/4 cup of the shredded coconut and 2 tablespoons of the cilantro and cook until slightly thickened, about 5 minutes.
- Scrape the sauce into a food processor or blender and puree. Return the sauce to the saucepan. Add the stock and the remaining tomatoes and 2 tablespoons of cilantro and bring to a boil. Season with salt and pepper and simmer over moderate heat until reduced to 5 cups, about 20 minutes. Keep warm.
- Meanwhile, in a large nonstick skillet, heat the remaining 2 tablespoons of oil until shimmering. Season the chicken with salt and pepper and sauté over moderately high heat until golden and cooked through, about 10 minutes.
- Add the chicken; season with salt and pepper. Spoon into bowls and garnish with coconut and cilantro. Serve with steamed rice and lemon wedges.
My Notes:
Ideally, we'd have started off with a caipirinha, but alas, we cannot purchase alcohol on Sundays in Minnesota (!), and I didn't plan ahead.
I have to laugh at the "fast" description Food & Wine gives this recipe. I would not describe it as fast, and I wouldn't suggest it to a beginner cook. However, if you have a food processor and some time, this recipe is worth it. The flavors remind us more of Thai food (probably the chili/garlic/ginger combination) than anything I'd expect from South America. It's delicious!
Photography Note:
I am experimenting with taking passable photos in incandescent light as we head into Minnesota darkness for the next few months. I have the best luck when adjusting the "white balance" on my dSLR to incandescent, +2 or +3, and using a tripod. If you have additional suggestions, please share!
Tim's Rating: 9/10
Liz's Rating: 9/10
Next week on The Amazing Race: Brazil (again!)

